Workshop
Real-world guides, tips and tricks.
The official Urutau documentation included with your files is already outstanding—every step is crystal-clear, with detailed drawings that leave little to guesswork.
This page exists to supplement that gold-standard manual with experience based insights and practical suggestions.
DISCLAIMER:
You are fully responsible for safe, correct assembly and use. Firearm building is serious—mistakes can have severe consequences. Follow official docs first and all laws.
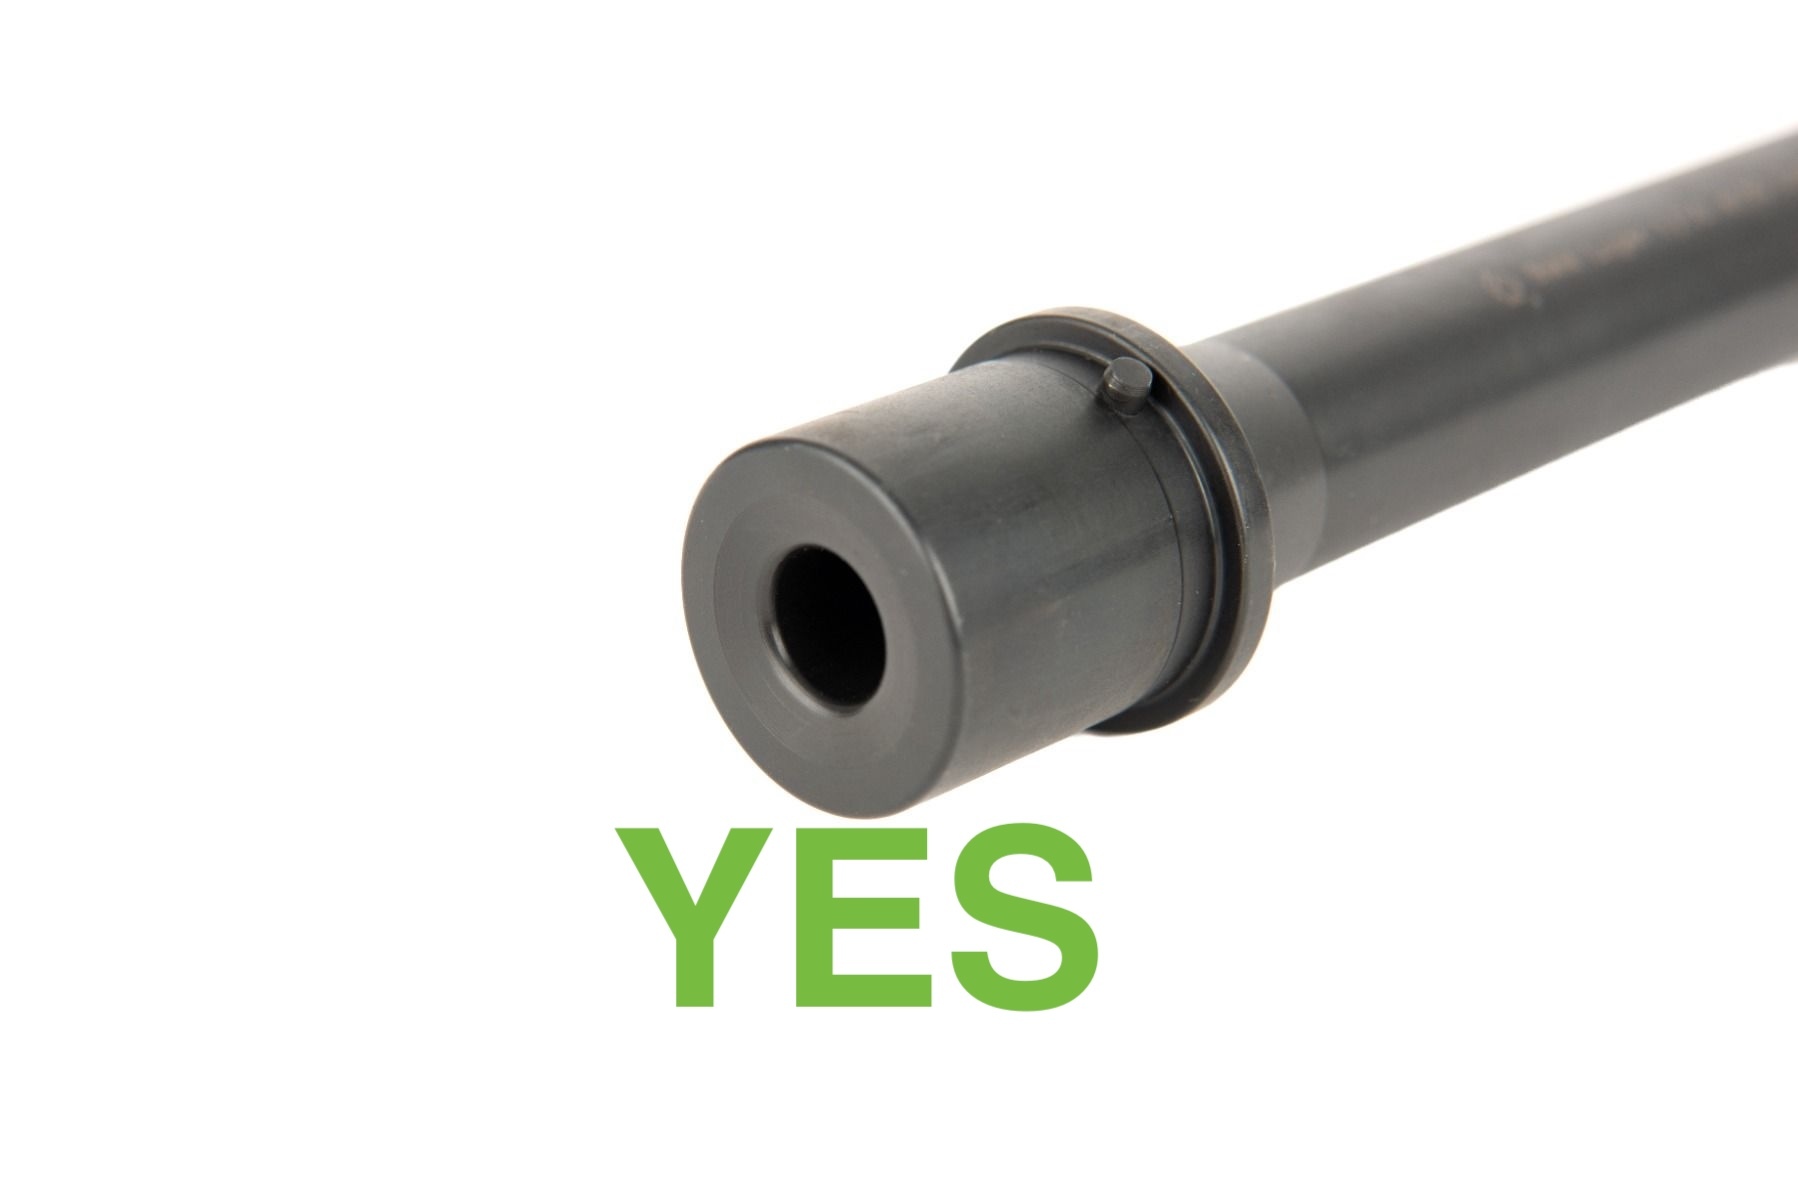
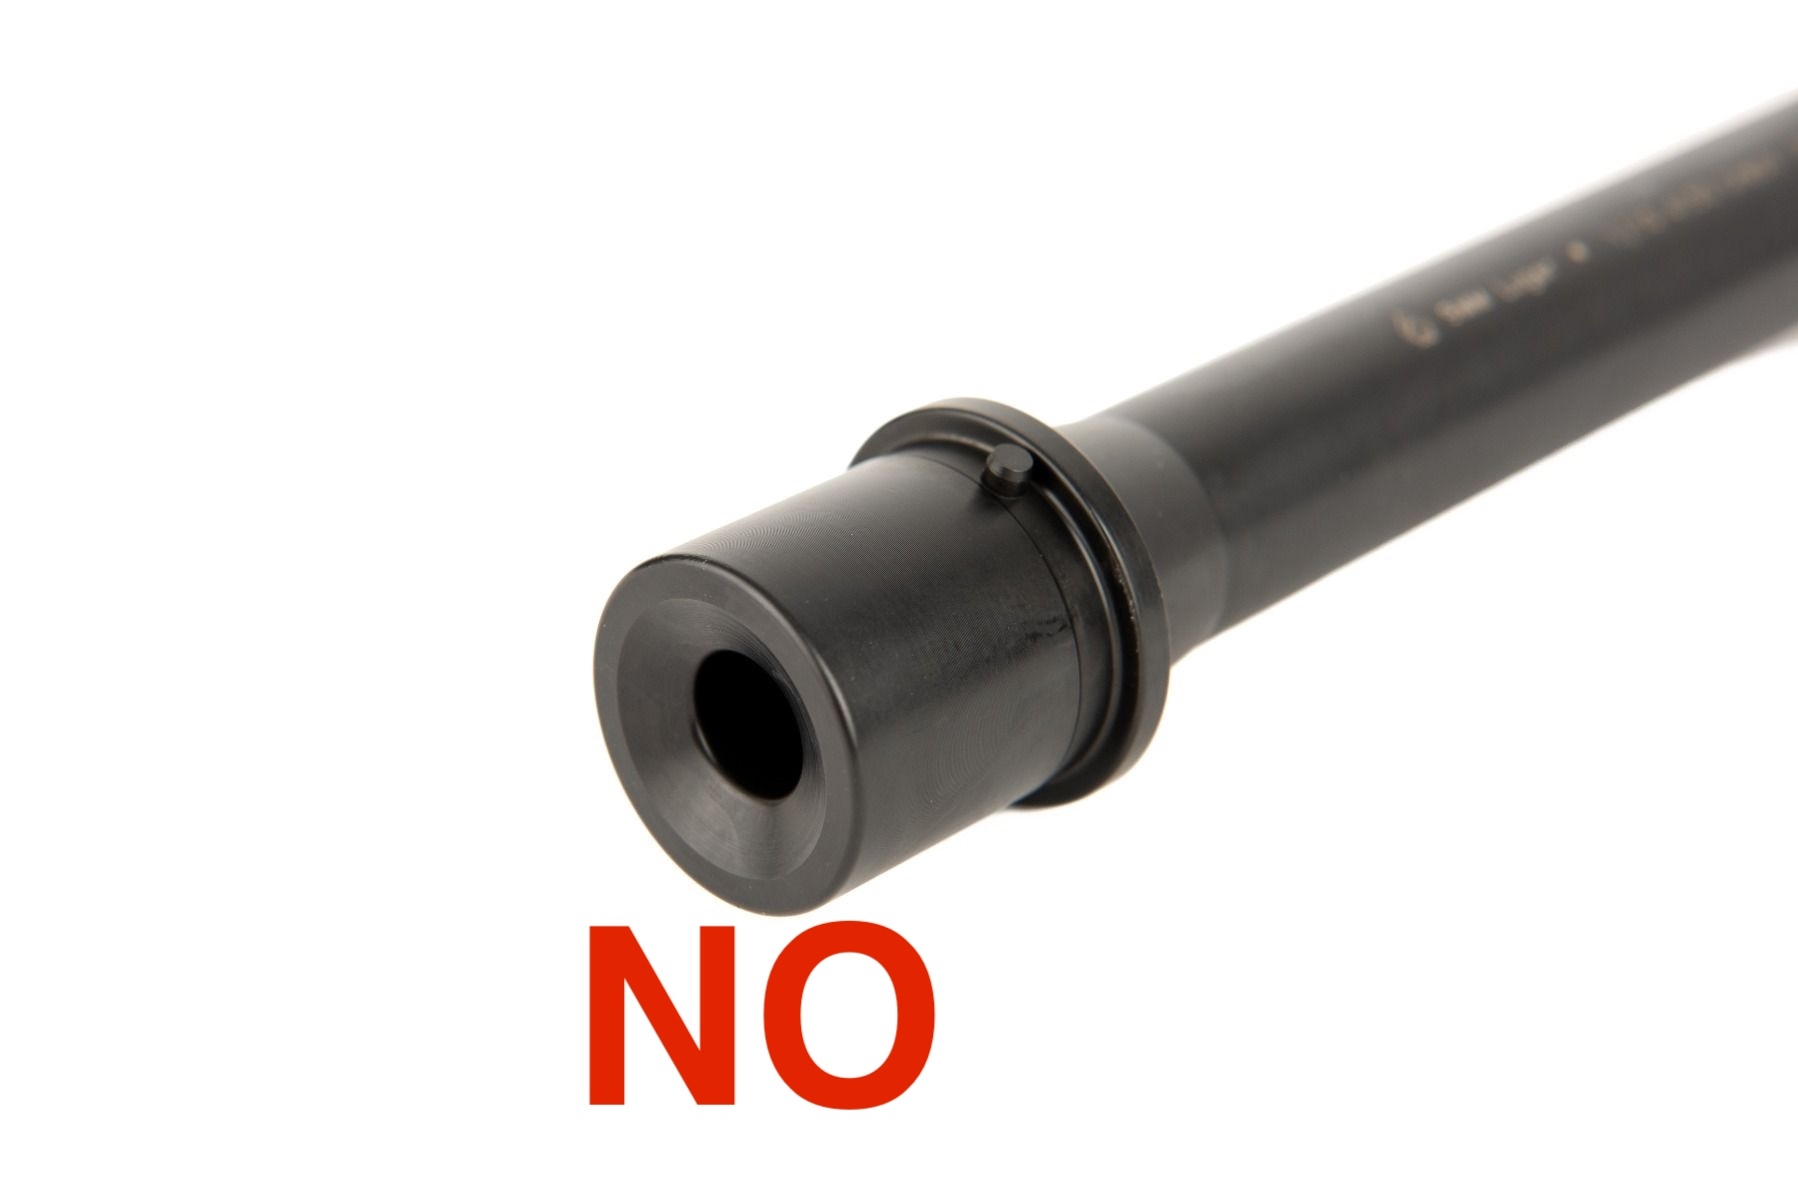
Barrel Selection
Choosing the right barrel for your Urutau is paramount to safety and reliability. It can also be confusing due to seemingly vast number of options. I use and recommend the Modern Series straight profile AR9 barrels from Ballistic Advantage. These have a slight bevel on the chamber side. Do not use their EPC or similar profile barrels. The deeper bevel is not only uncessary, but it can lead to an out of battery occurence.
Important Legal Note: Any barrel under 16" must be installed on a lower receiver registered as a Short-Barreled Rifle (SBR) with the ATF. To help you stay compliant, we offer blank aluminum SBR data plates and include a direct link to the matching SBR receiver STL.
A barrel cover optimized for the common 11" barrels is available for free download on our Downloads page.
Printing the Upper
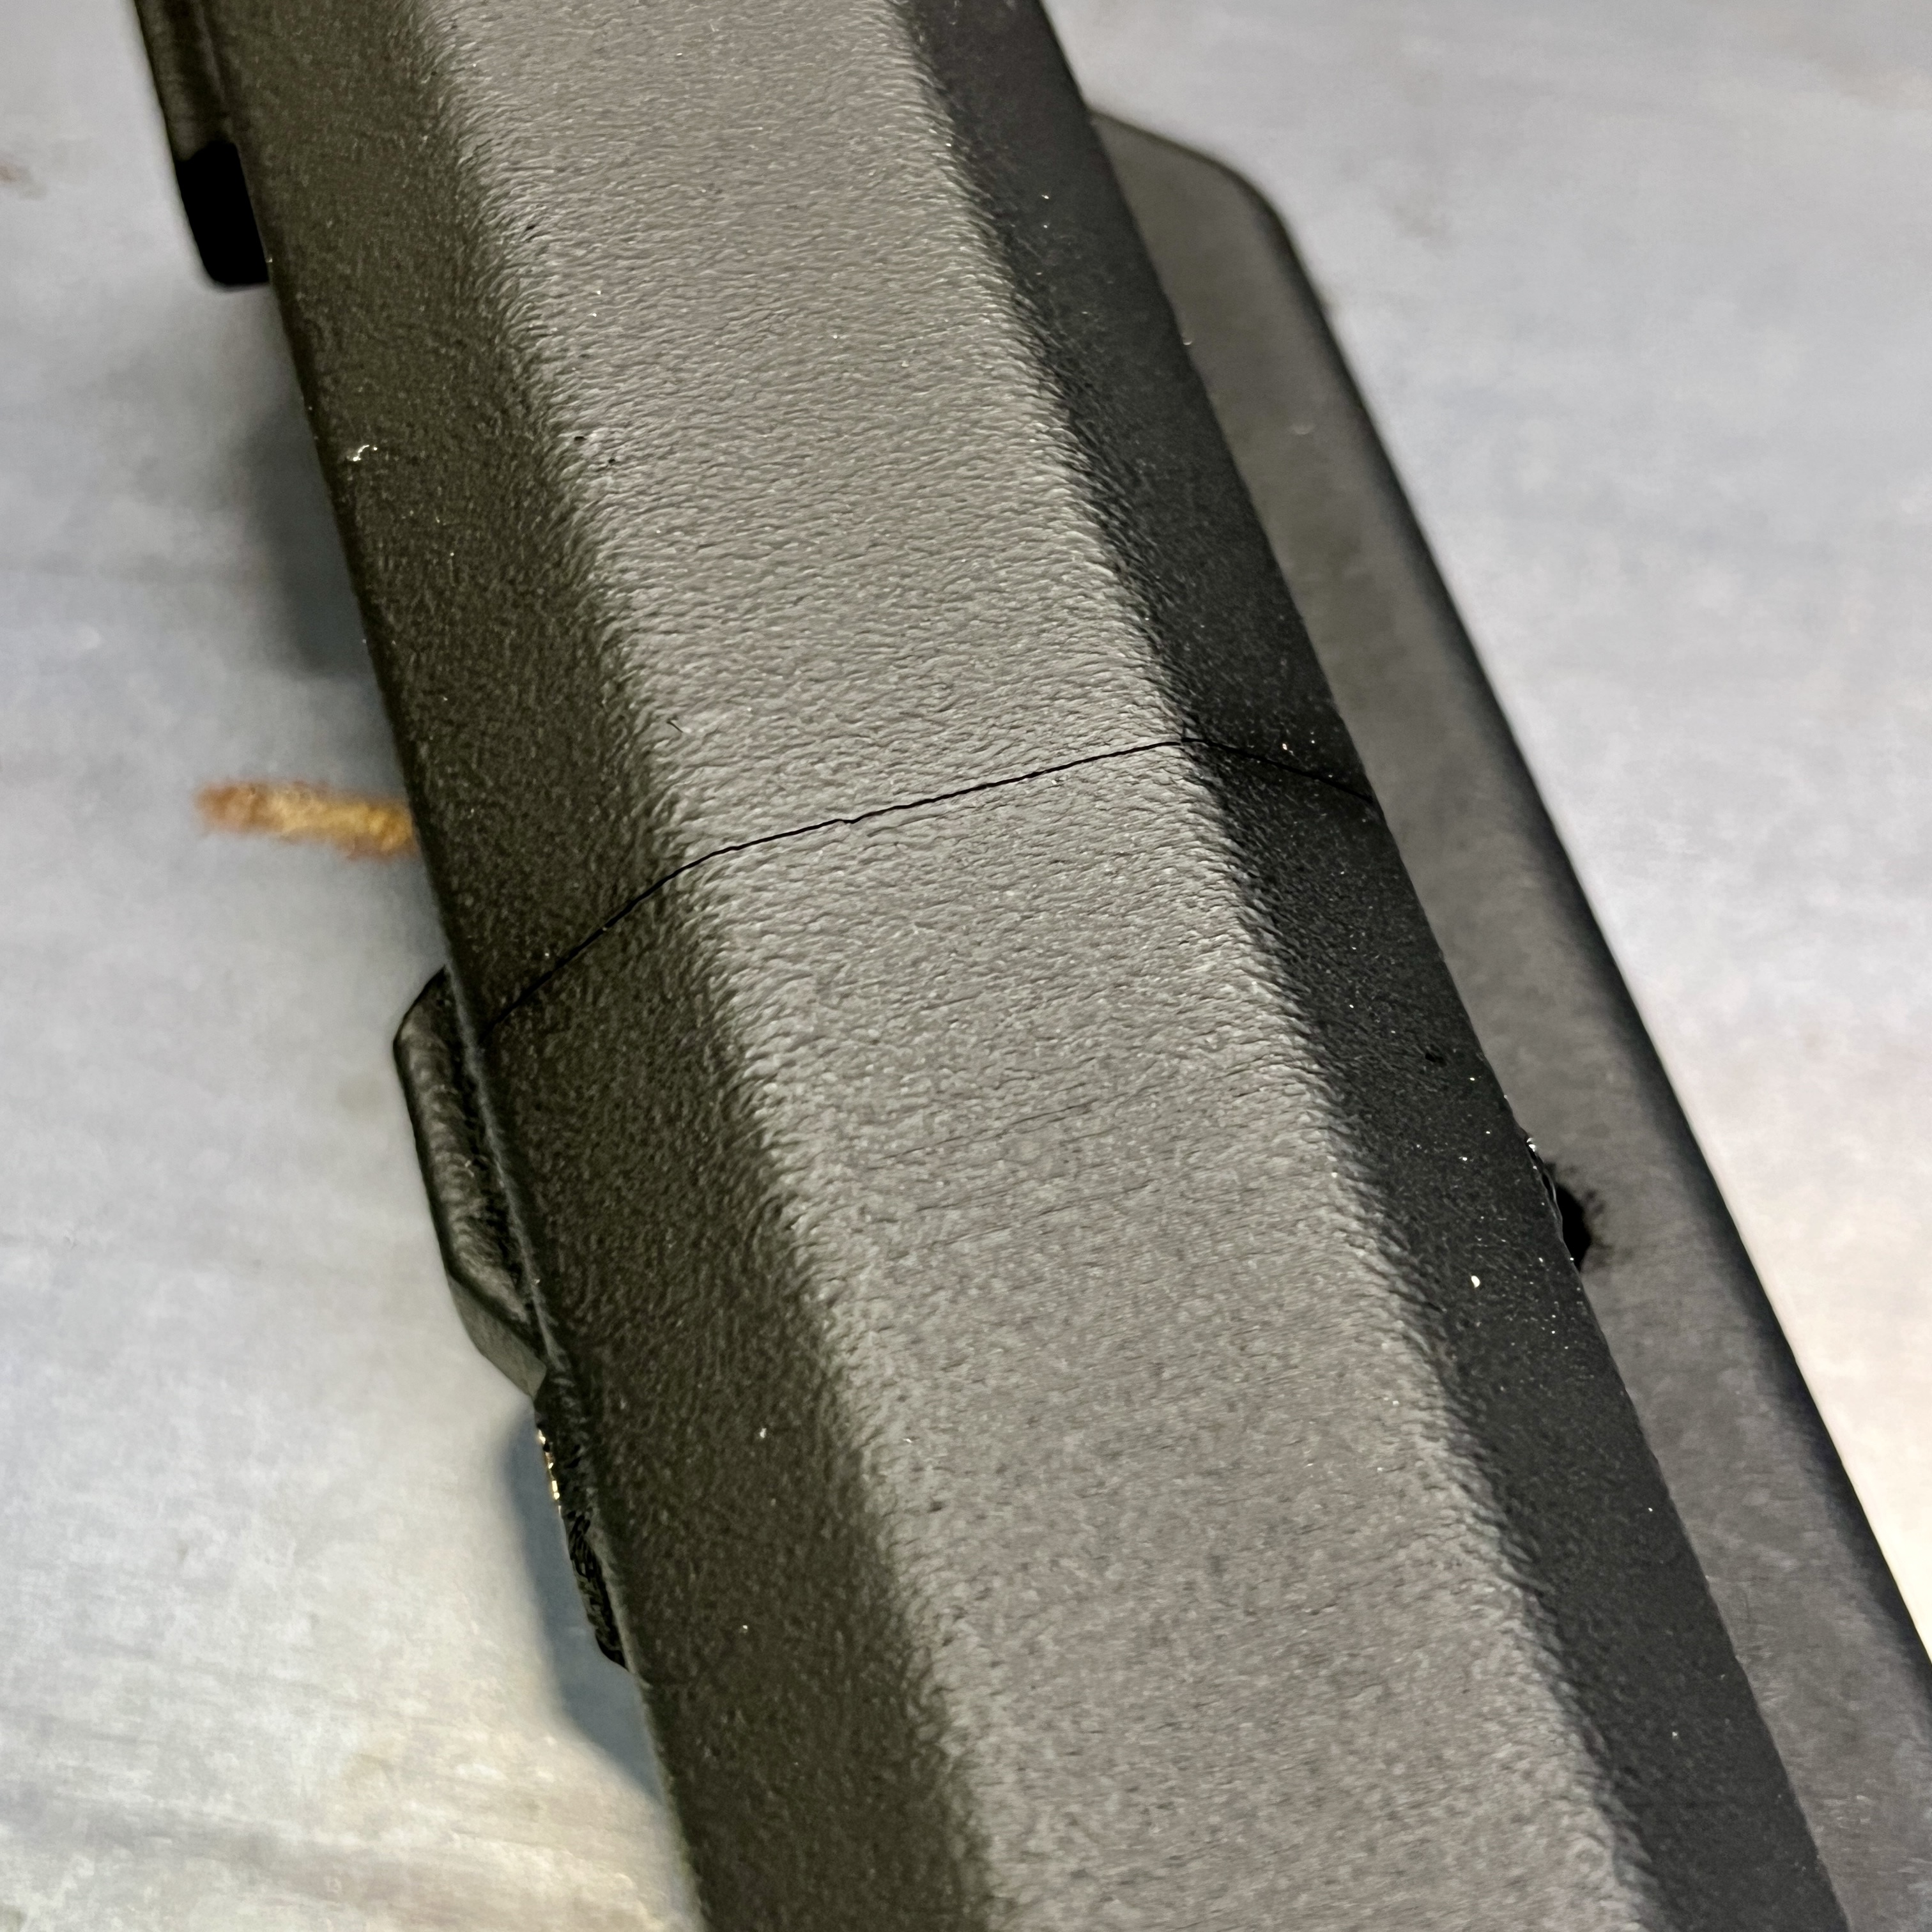
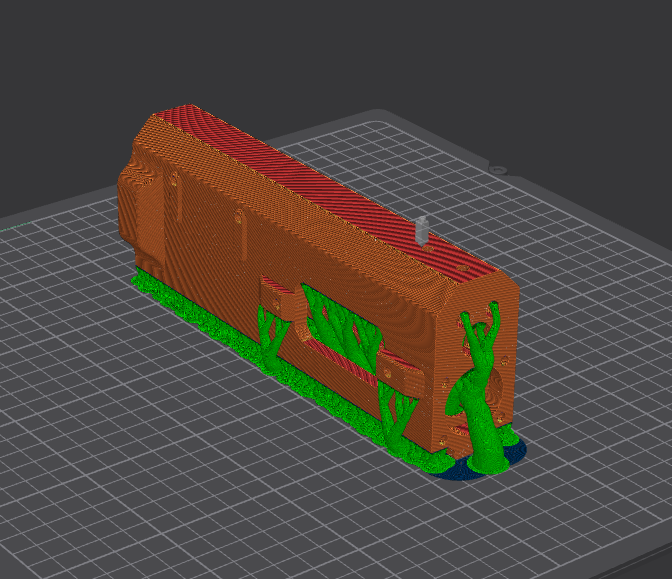
One key area where deviation from the Urutau documentation is strongly recommended is the print orientation of the upper. For maximum strength and reliability, the part should be printed horizontally (flat on the build plate, with the primary load path aligned in the XY plane). Printing vertically—as suggested in the official guide—places layer bonds perpendicular to the stress direction, making the part highly vulnerable to interlayer delamination under dynamic loading.
During real-world testing with experimental parts and designs, vertically printed uppers cracked along layer lines when subjected to bending forces caused by malfunctions, including failure-to-feed and failure-to-extract jams. These events generate sudden, high-magnitude shear and torsional stresses that exploit the inherently weak Z-axis bond strength (~20–30% of XY strength), resulting in catastrophic splitting.
In contrast, horizontal orientation aligns layer fusion parallel to the load path, dramatically increasing delamination resistance and enabling the part to survive the same abusive conditions without failure. Printing right side up with tree supports results in excellent surface finish without a significant increase in print time or filament usage. Printing top side down is also a viable option.
Filament Recommendations
If you ask 10 different people which filament you should use you will probably get 10 different answers. Based on first hand experience with several different filaments (and many bad outcomes) here are some options that you may want to consider. These are based on different levels of 3D printer capabilities. For each filament a layer height of .16mm, 100% infill and wall count of 5 is recommended.
Entry level printer (250°C hot end, no enclosure): PCTG
PLA+ is the "norm" in the 3D2A world because it's dead simple to print—anyone with an Ender 3 can crank out a lower without drama. It's tough enough for casual builds or prototypes, with enhanced ductility over plain PLA making it less brittle under drops or light impacts. But for real-world reliability (recoil, humidity, heat), it's the baseline you outgrow fast.
For those who want to step up to a filament that prints just as easily as PLA+ (no enclosure, no warping, no drama on an Ender 3), yet delivers vastly better impact resistance, heat tolerance, UV stability, and chemical resistance, PCTG is the no-brainer upgrade. It absorbs far less moisture than nylon, won’t soften in a hot car (HDT 75–80°C vs PLA+’s 55–60°C), and shrugs off gun oils, CLP, and solvents that make PLA+ swell or craze. Drop-tested parts survive concrete falls that shatter PLA+, and recoil stress is handled with ease—think 500–1,000+ rounds without cracks. At $40/kg with a rainbow of color options (check 3dfuel.com for premium blends), it’s still wallet-friendly. Save PLA+ for prototypes and shelf queens.
Mid-grade printer (300°C hot end with enclosure): ABS-GF
Reinforced nylons like PA12-CF get a lot of buzz in the 3D2A community for their impressive dry-lab specs, but my real-world experience in humid environments has been a hard pass. PA12 is highly hygroscopic, even with carbon fiber reinforcement, absorbing 0.5–1.2% moisture in high humidity. That slashes tensile strength by 20–40%, drops stiffness by about 30%, and causes parts to swell 0.2–0.5%, enough to loosen trigger pins or bind the magwell. It’s also expensive at $80–120 per kilogram and a pain to print, requiring a dry box and full enclosure.
ABS-GF, on the other hand, shrugs off humidity with less than 0.3% moisture absorption, delivers better impact resistance thanks to its ductile nature, and holds up to heat with a deflection temperature of 90–110°C. It prints easily—an enclosure is recommended but not mandatory—and avoids the warping issues of plain ABS. The surface finish is outstanding, with a light texture that hides layer lines completely. At just $30/kg from Bambu Lab, with color options available, it’s a fraction of the cost of PA-CF. UV resistance isn’t its strong suit (think faded car trim), but a yearly application of 303 Aerospace Protectant or a simple top coat fixes that. Proven in designs like the KP-15 and GWACS lowers, ABS-GF takes thousands of rounds without complaint. For humid climates, skip the nylon hype—ABS-GF is tougher, cheaper, and truly humidity-proof.
Annealing ABS-GF is highly recommended to dramatically boost strength, layer adhesion, and heat resistance. For Bambu Lab ABS-GF, heat the printed part to 95°C (200°F) for 8 hours, then let it cool slowly inside the closed oven to avoid warping. I have not noticed measureable shrinking after this process. Never use your kitchen oven due to toxic fumes—opt for a dedicated convection toaster oven in a well-ventilated space instead. For precision and reusability, the Sunlu FilaDryer E2 reaches up to 110°C and doubles as both a dryer and annealer.
Prosumer-grade printer (350°C hot end, enclosure optional): PPS-CF
Want to print parts that feel and sound like aluminum? If so, take a look at PPS-CF.
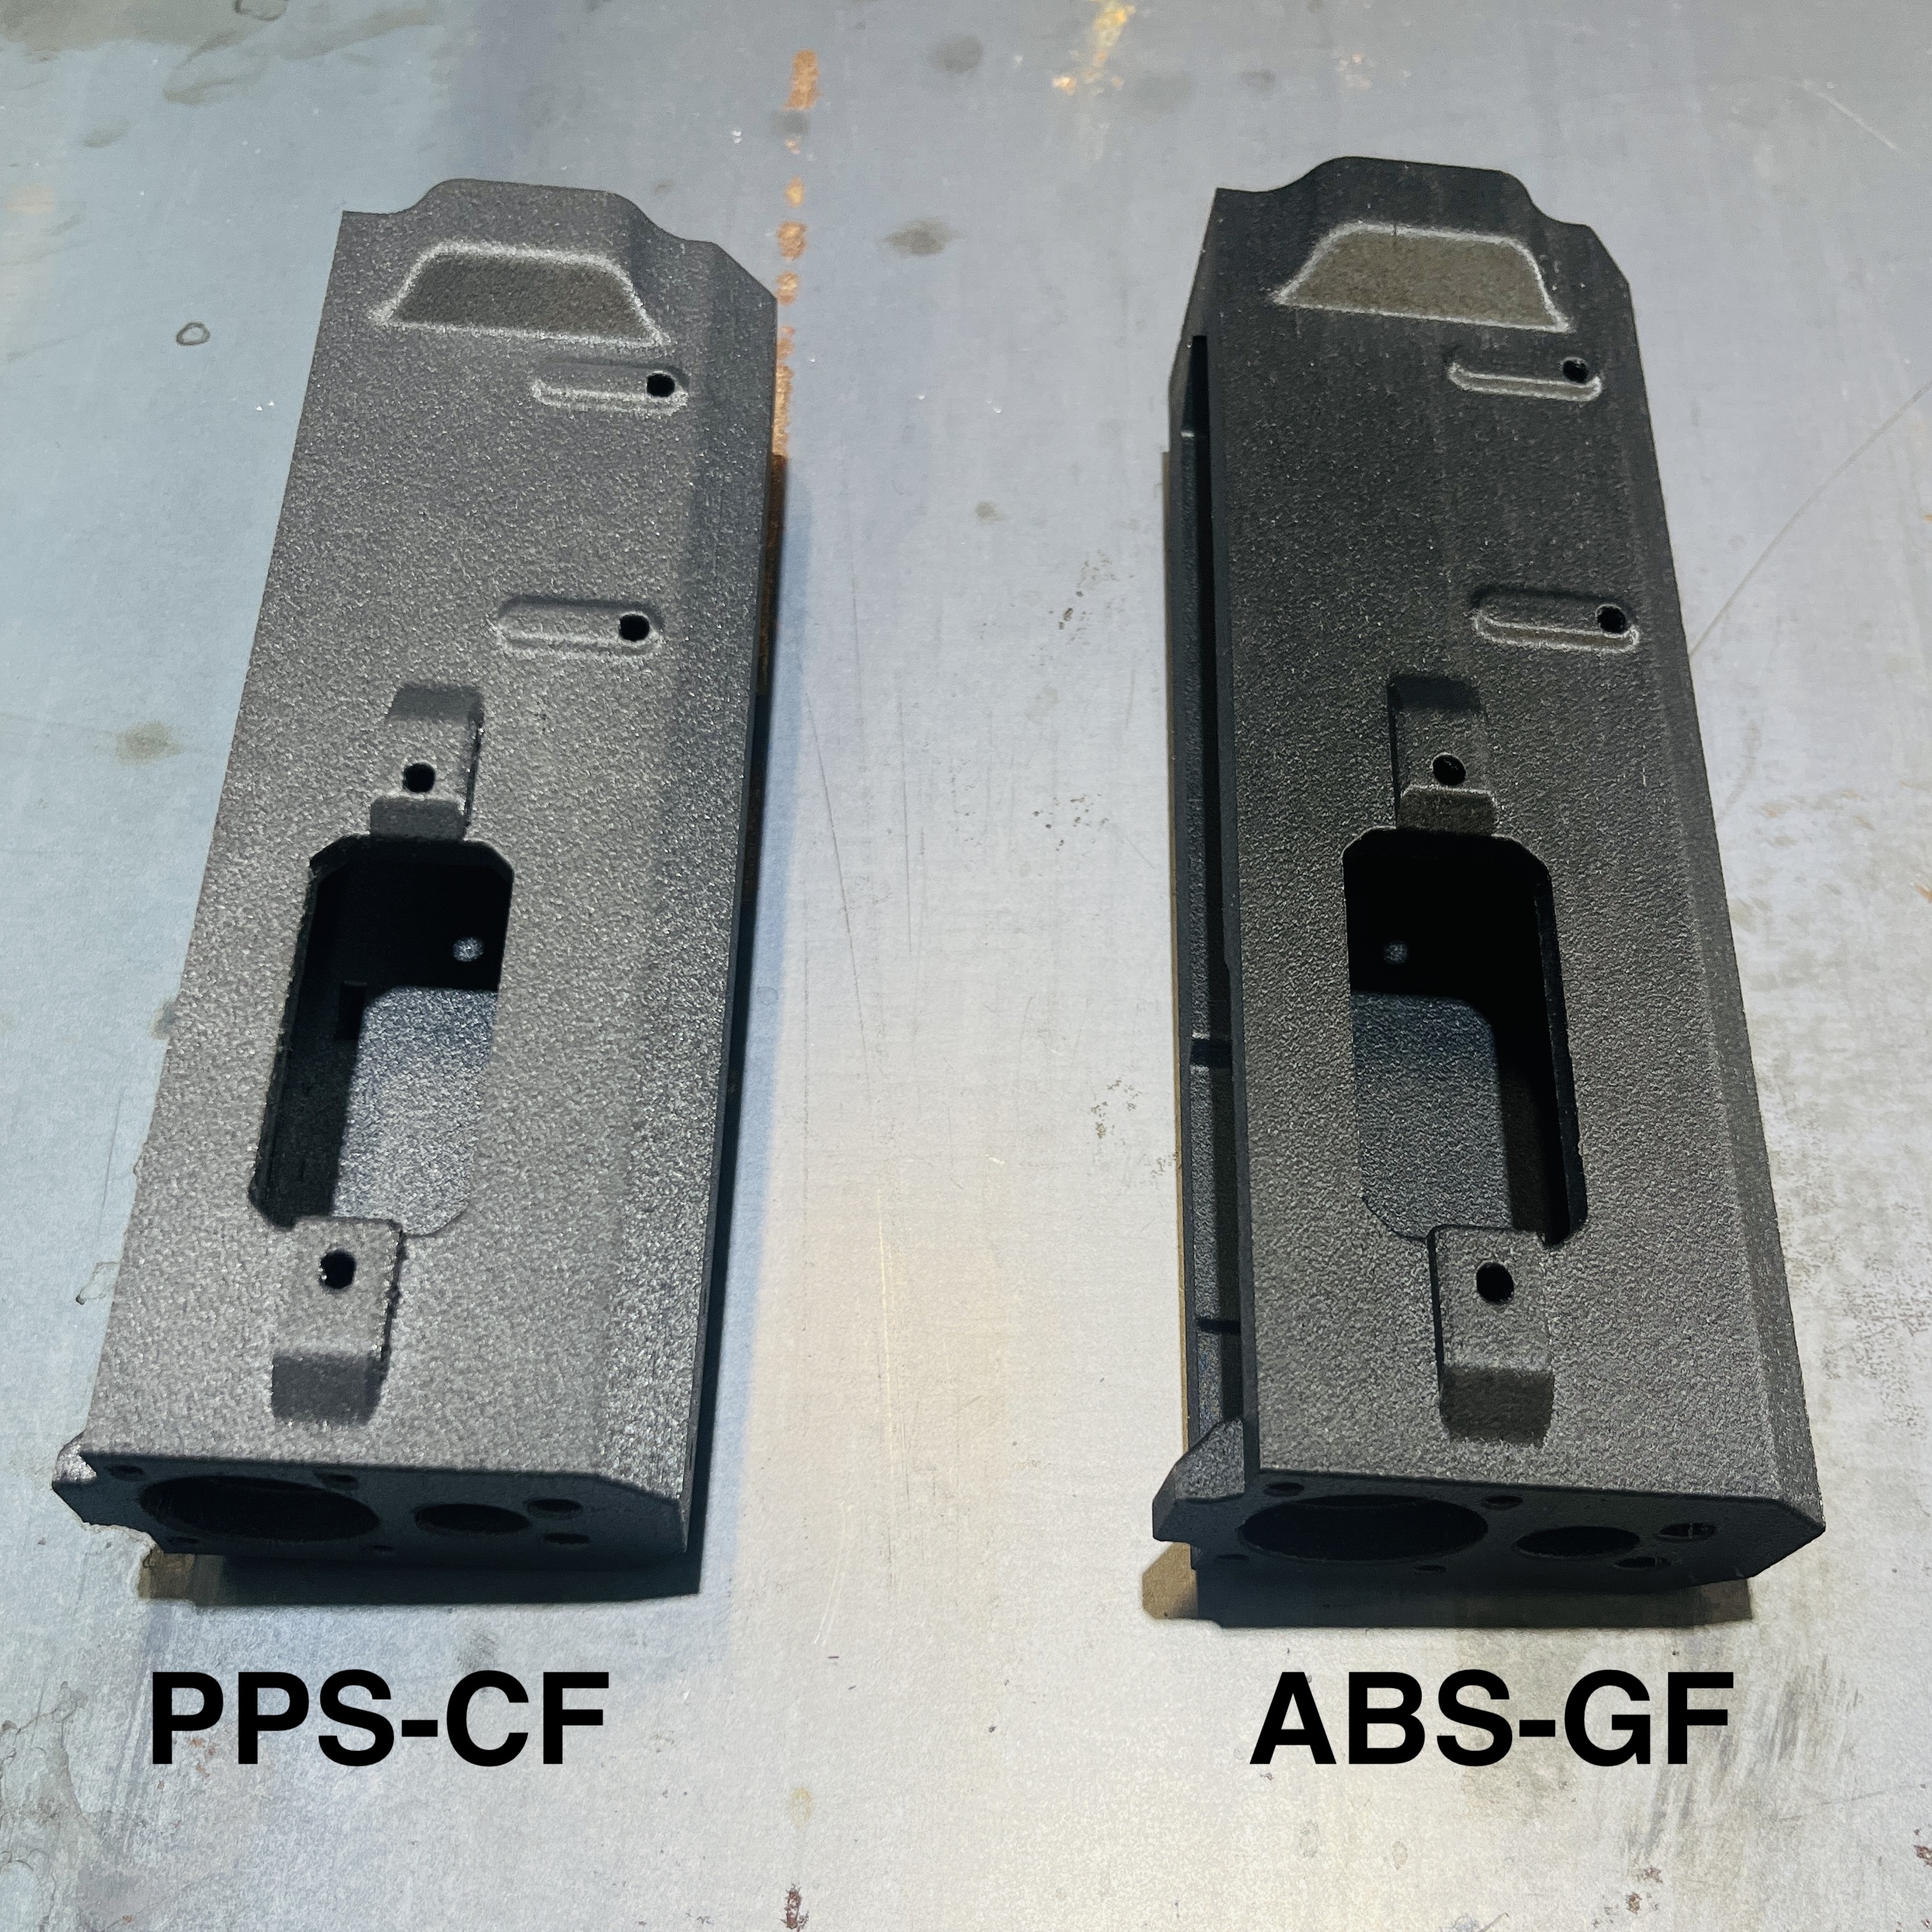
I print my barrel covers from Fiberon PPS-CF because it shrugs off heat without warping, softening, or reacting to CLP and solvents, while staying lightweight and corrosion-free. The filament prints effortlessly—no enclosure needed, zero warpage—and delivers a consistent, textured finish that hides layer lines completely, giving a premium, almost injection-molded look straight off the bed. I love the deep, bell-like tone when I tap the cover; it feels solid and purposeful in hand. At $120/kg, it’s not cheap, but for a non-load-bearing heat shield that needs to look, feel, and perform like metal—without the weight or rattle—it’s perfect.
I’m also experimenting with a PPS-CF upper. The design uses thick, uniform walls with no stress concentrations, letting the material’s >200 MPa post-annealed strength and high stiffness handle firing loads and maintain optic zero. So far, it’s holding up on the range. That same textured, layer-free surface comes through beautifully, and printing is just as forgiving. But drop survivability is still unproven—despite the robust geometry, PPS-CF can fracture under sharp impact. This isn’t a drop-in replacement for aluminum; it’s a high-performance prototype where heat tolerance, weight savings, and print quality justify the cost and risk.
In short: for heat-exposed, non-structural parts like barrel covers, PPS-CF is ideal—thermally invincible, sonically satisfying, and visually refined. For a thoughtfully overbuilt upper, the material fits the design intent, but impact toughness keeps it firmly in experimental territory for now.
For Fiberon PPS-CF the annealing process is 180°C (360°F) for 6 hours with a slow cool down period inside the oven with door closed. Just like ABS-GF, I have not observed measureable shrinkage.

The Sound of PPS-CF – Click to play